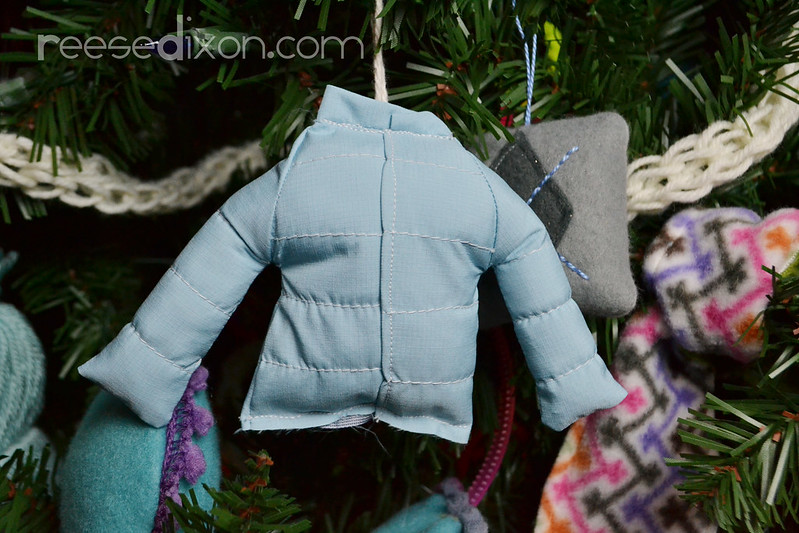
Like everyone of my generation, one of my favorite Christmas movies is “A Christmas Story,” and we quote it endlessly around here. Particularly whenever we bundle up and we reenact the scene where the little brother is so covered in puffy winter clothes that his arms stick straight out as he whines, “I can’t put my arms down!” When I found this blue raincoat material in the remnant bin of my fabric store, I knew immediately that I had to find a way to include that moment in the tree.
This is the most complicated tutorial of the whole month, but don’t let it intimidate you. It’s still all just straight seams, no worries about fit or closures, and if any of the pieces get to small for you to want to deal with them in your sewing machine, it will work great with just a few stitches done by hand.
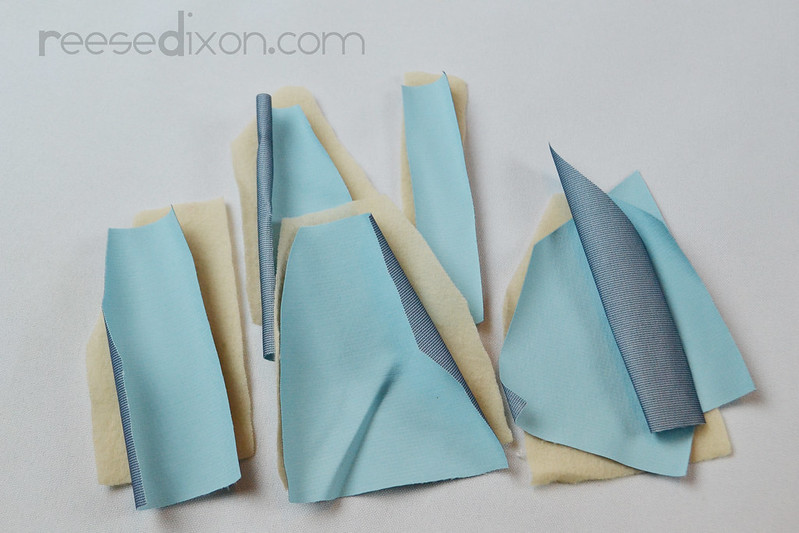 Download the pattern I’ve made for you and cut out all the pieces. You’ll need one of every piece except for the sleeves, which you’ll need two of, of course.
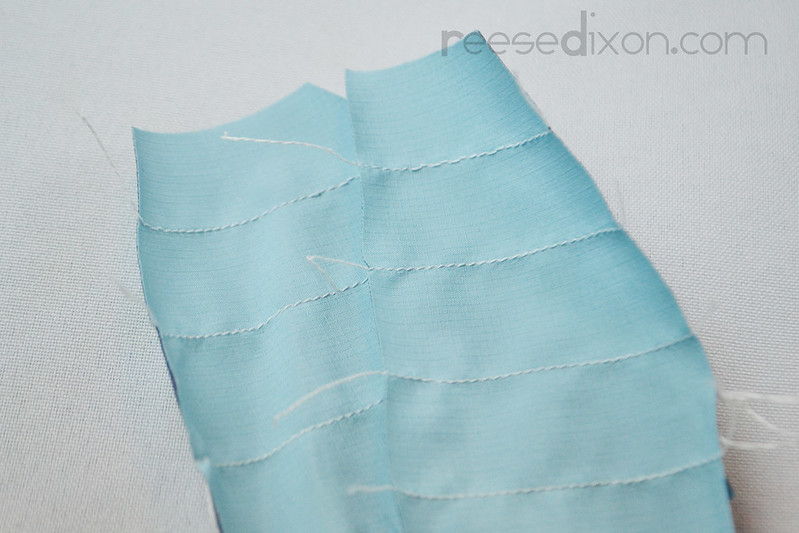 To make the coat puffy you need to add some lines of stitching to gather it. I sewed a bunch of lines of straight stitching about 3/4″ apart. The spacing doesn’t matter a whit, just pick a line on your sewing machine and use it for everything.
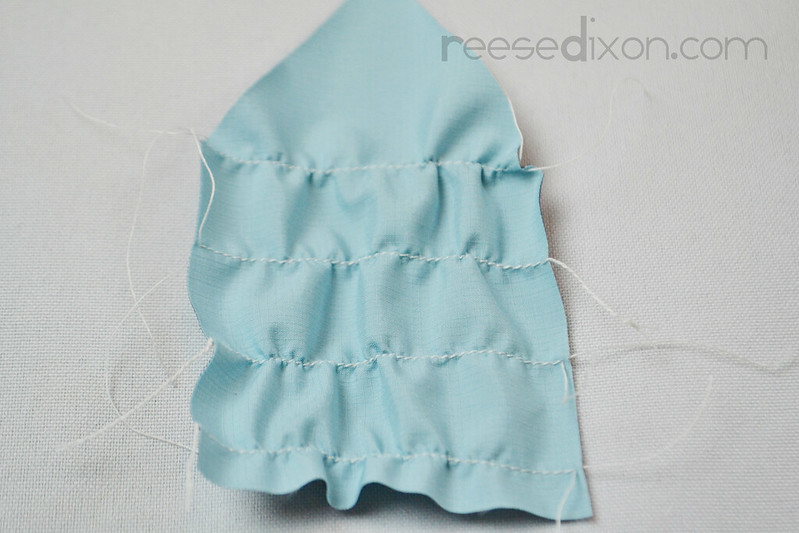 Leave the ends of thread long so that you have plenty of room to grab on to them, and pull the back thread to gather. Don’t pull it as tight as it can go, just enough to give you a bit of a puff.
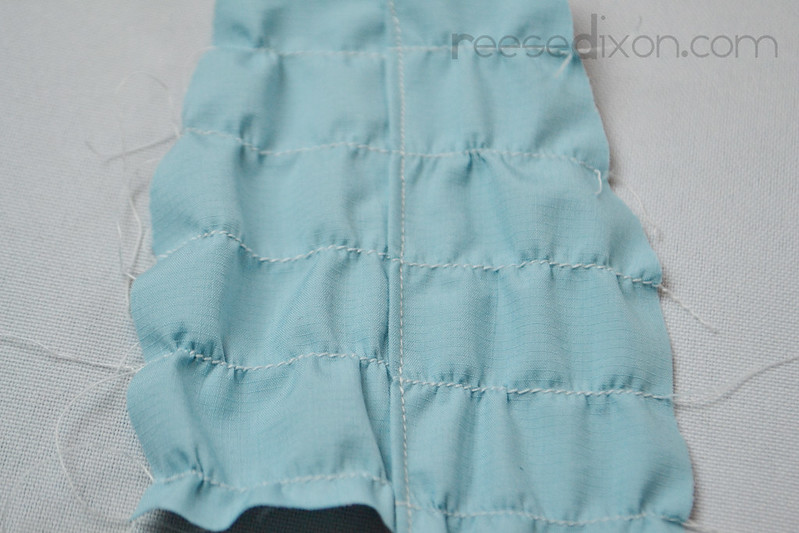 The front of the coat comes in two pieces. Fold the inside edge of one of the pieces over about 1/4″ and sew it on to the other front piece, just like we did when we made our flannel shirt ornaments.
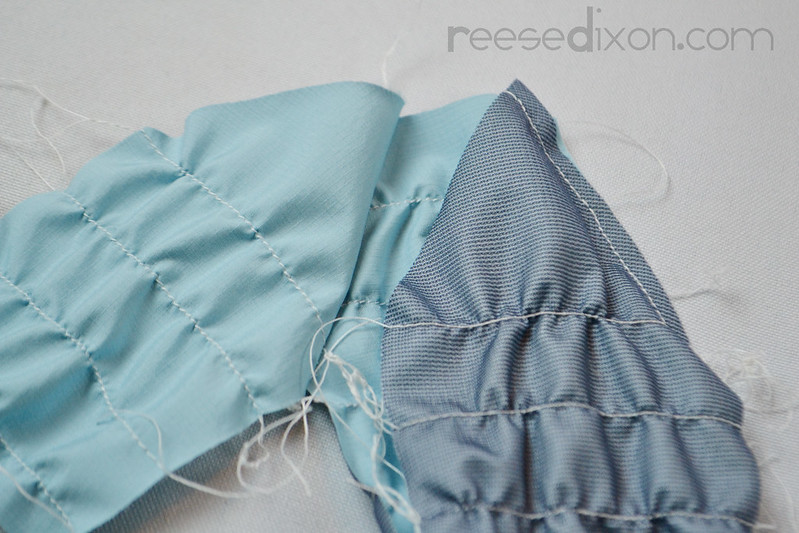 The next few steps are sewn up just like when we did the raglan sleeve sweater ornament. Line the edge of one of the sleeve pieces up with the front piece and sew in place. Repeat with the other sleeve on the other side of the front piece.
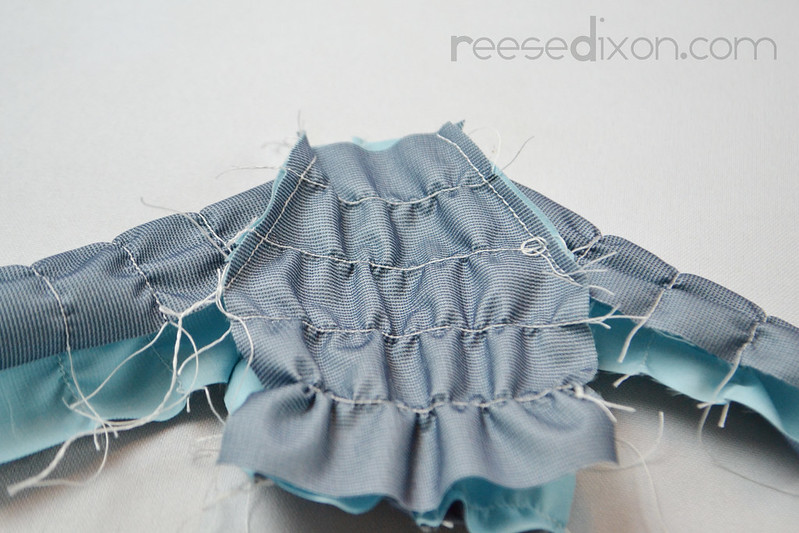 Sew the back piece to each sleeve in the same way.
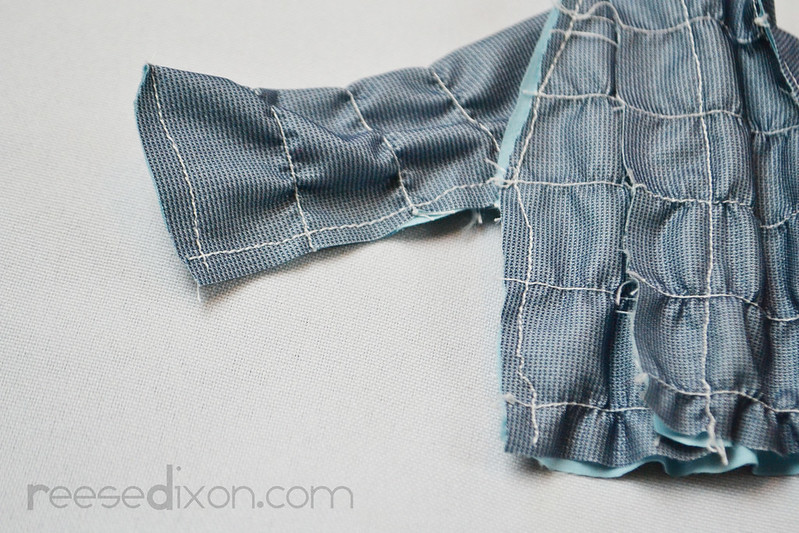 We’ll sew the sides shut like the sweater too, only this time we want to sew the sleeve cuffs shut so we can stuff the coat. So start your line of sewing at the sleeve cuff, turn the corner to sew down the sleeve, turn at the armpit, then sew down the body. Repeat on the other side and then turn your coat right side out.
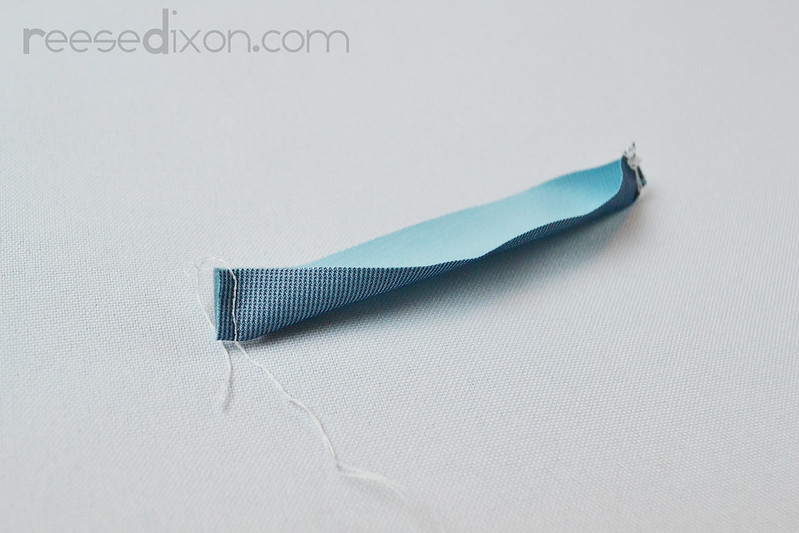 Now we need to deal with the collar. For starters take the collar piece and fold it in half. Sew those sides shut and then turn it right side out. This makes a nice finished point for your collar edge.
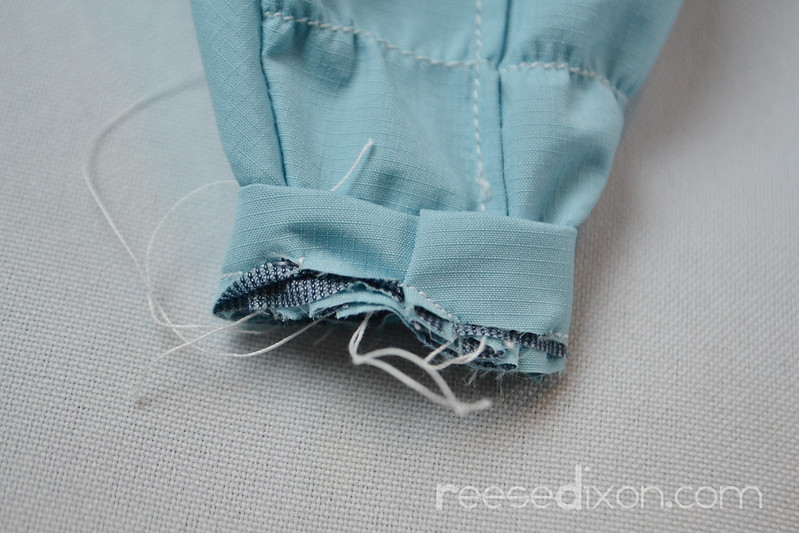 This is the most intricate bit of sewing in the whole coat, so you might have the best luck by doing this by hand. I’ve done it on my machine, so it’s possible, but it does take a lot of wrestling. Line one end of the collar up with the seam on the front body piece and wrap the collar all the way around the back and back around the front to overlap, being careful to keep the coat out of the way of anything you don’t want sewn.
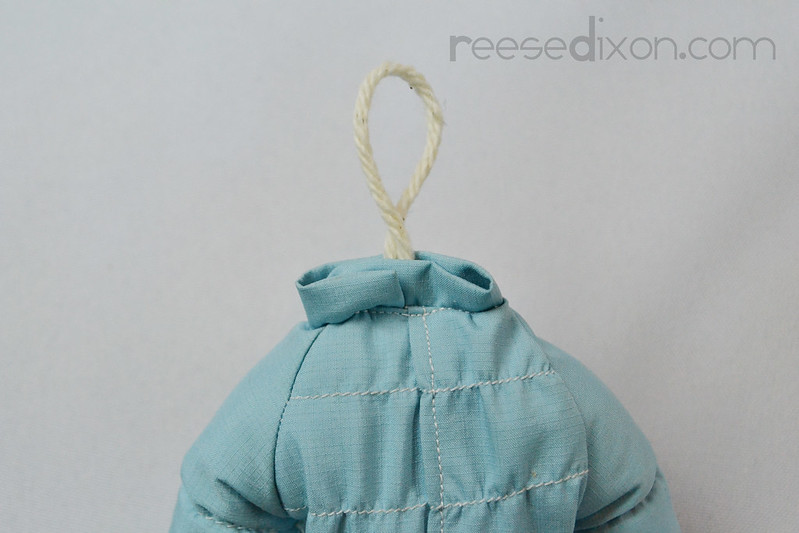 Flip that collar up so that all the seams go to the inside of the coat. Place a loop of yarn inside the neck and sew across the collar to close it up.
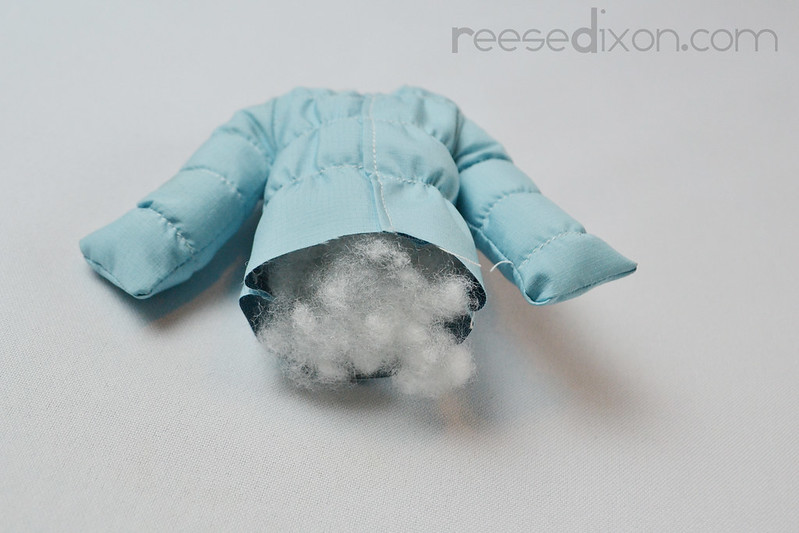 Stuff the coat at the bottom, making sure to really fill those arms up. The puffier the better, to really get that look of not being able to put your arms down.
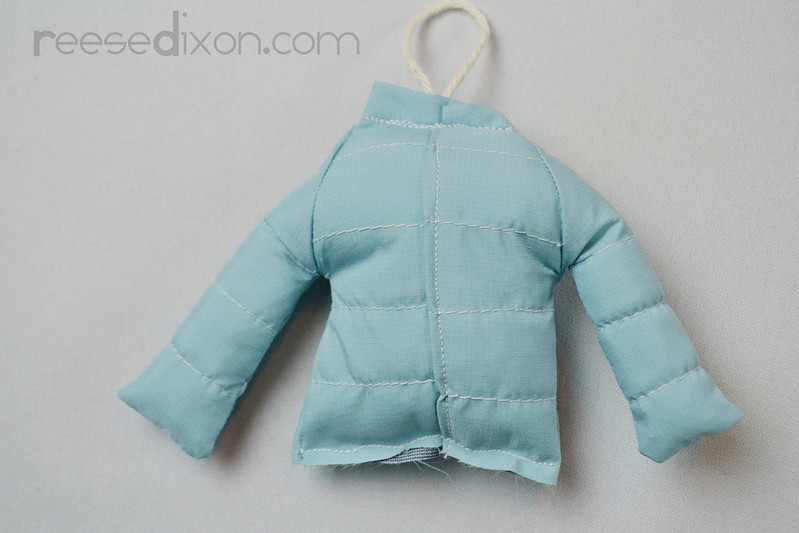 Sew across the bottom to close it up. Since my fabric won’t fray I just left the edges out in the open, but you could always fold the edges in before you sew if you want it super clean.
I am loving this for all the same reasons I’ve been loving so many of these ornaments – the miniature quality, the cozy factor – but this one I’m also really loving because it reminds me of a movie I love and our dorky family inside jokes. Which is kind of why I do all this stuff anyway.
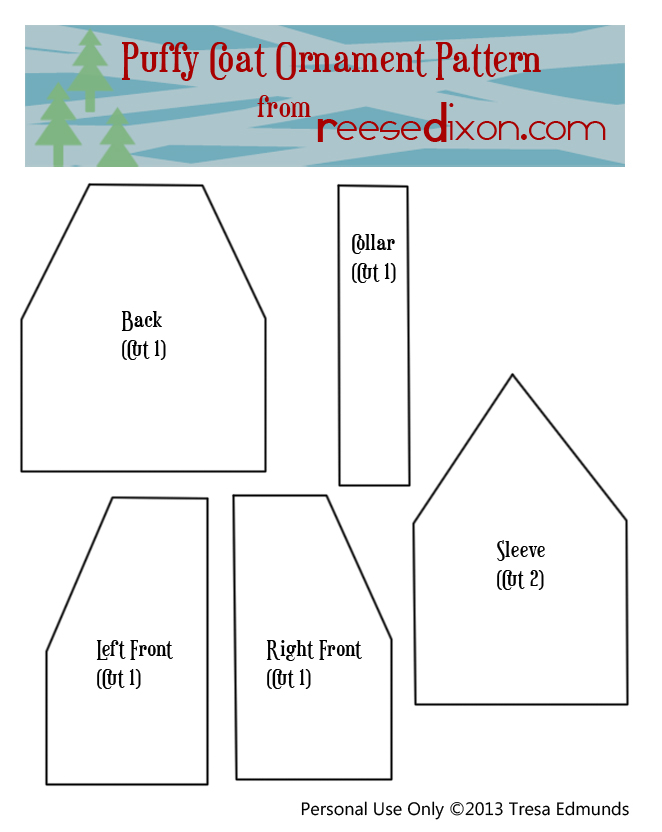
To download the pattern click on the image and download the original size.


haha. The channel reesedixon never fails to make you laugh. You can also get many incredible ideas from this channel. By the way, good to see the cute blue coat :p