Today’s the big Halloween party over at A Fanciful Twist, so I’m popping in for a rare weekend appearance to share in the festivities.
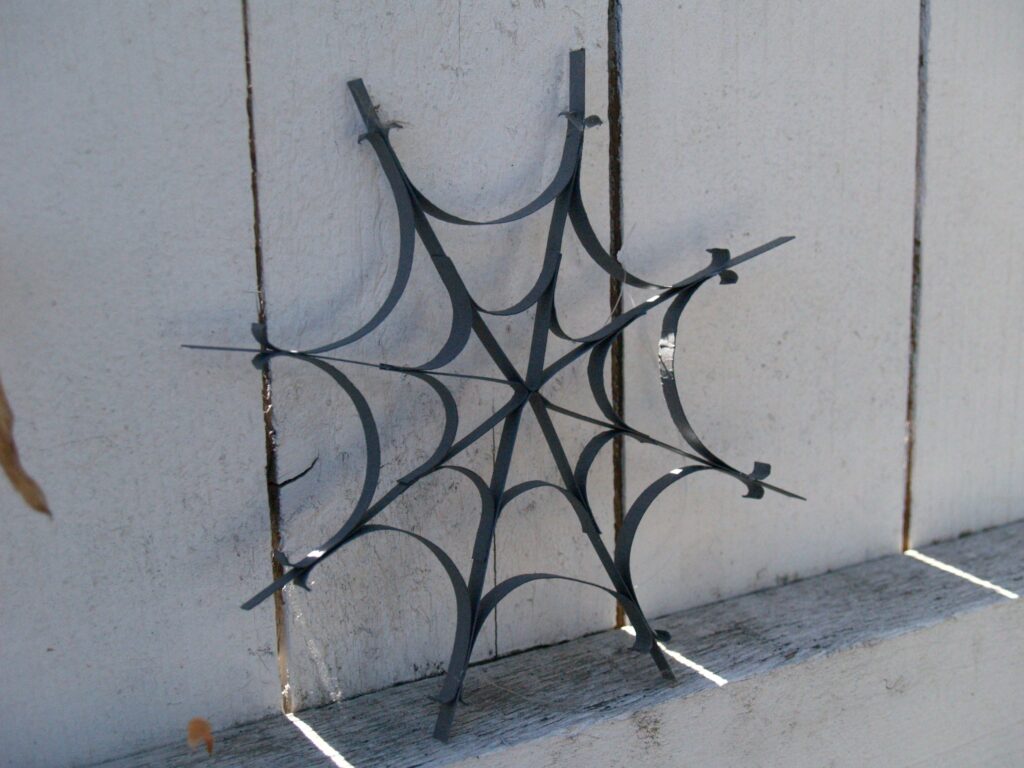
I’ve been obsessed with spiderwebs this year, and it all started from this project. I still have two more ornaments to share that draw on the simple spider. I just couldn’t seem to get over those graceful curves. During last year’s Christmas festivities, my little quilled snowflake got a lot of appreciation, so I wanted to go back to quilling to see what else I could come up with. A spiderweb seemed like a natural.
To begin, cut a whole mess of 1/4″ wide strips from cardstock. I used a really stiff metallic cardstock that worked out great. The thicker weight was more difficult to roll up and bend, but since this design is so open, I don’t know that a really thin weight of paper would hold up very well. The stiffness really worked in my favor. If you just must use a thinner paper, I’d try spraying the whole thing with a spray sealer at the end to give it some stiffening after the fact.
From those 1/4″ wide strips cut:
4 strips at 6 inches
8 strips at 3 inches
8 strips at 1/2 inch
Then we’ll take those strips and make the shapes we need out of them. More specific quilling instructions are available on that original quilling post, including all those different shapes, but it’s super easy. We’re just talking about rolling up paper here.
Fold the 6 inch strips in half to make a big V.
Roll each end of the 3 inch strips towards the center to make a scroll.
Roll the 1/2 inch strips up to make a loose circle.
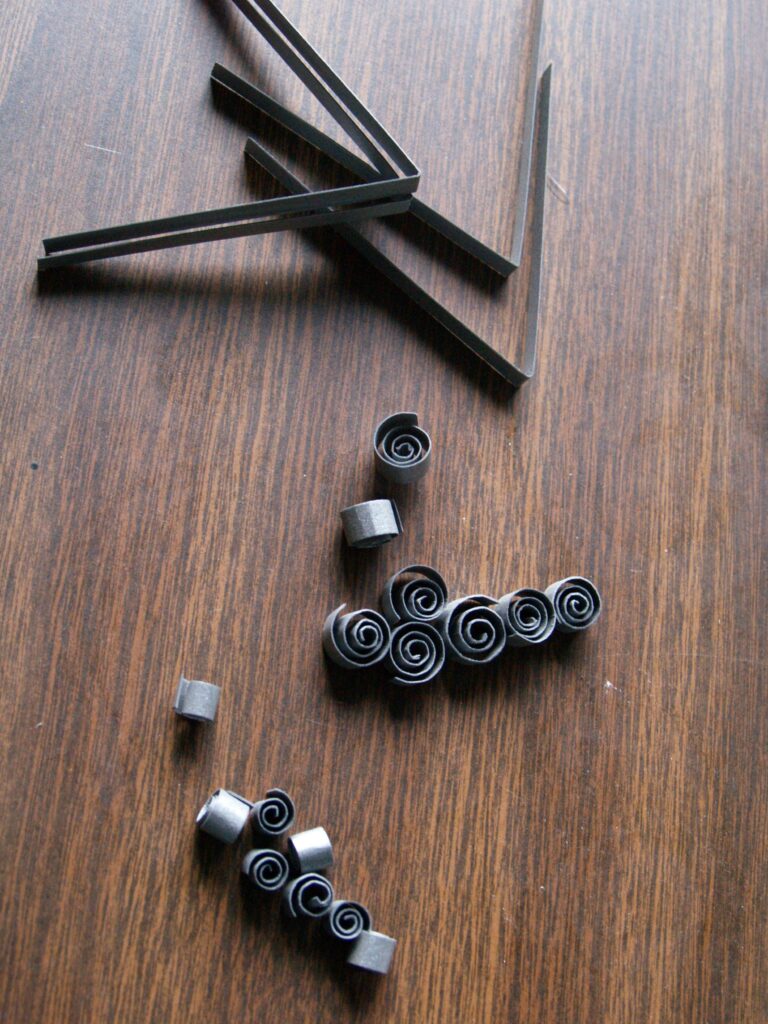
I rolled my 3 inch strips into a loose circle here, which will work if you want to save yourself a step, but if you roll up both ends you’ll get that little fleur de lis look when you’re all done.
With all your pieces made, it’s time to begin construction, which starts with the arms of the web. Glue two of your V’s together at the point, and allow to dry. A bobby pin works great to hold things together until the glue kicks in, and prevents any little fuzzy helpers from knocking things around and destroying them. This project was very seductive to those dang cats of mine.
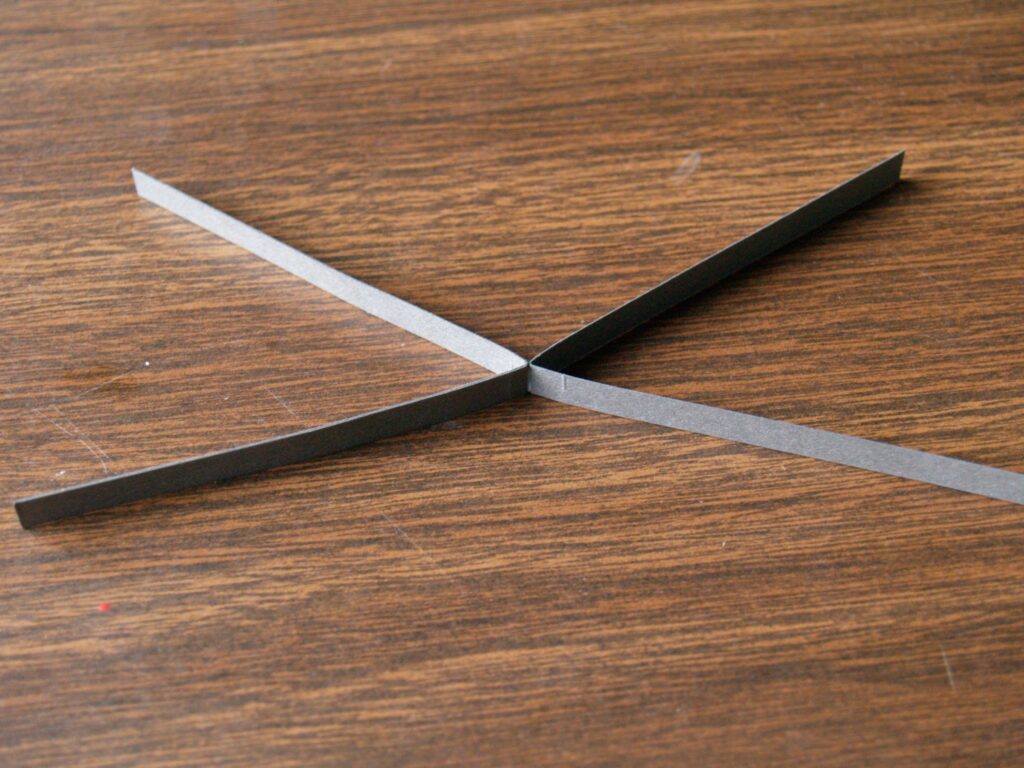
Then come in with your other two V’s and glue those points to the points of what’s already glued together to create a bunch of little spokes.
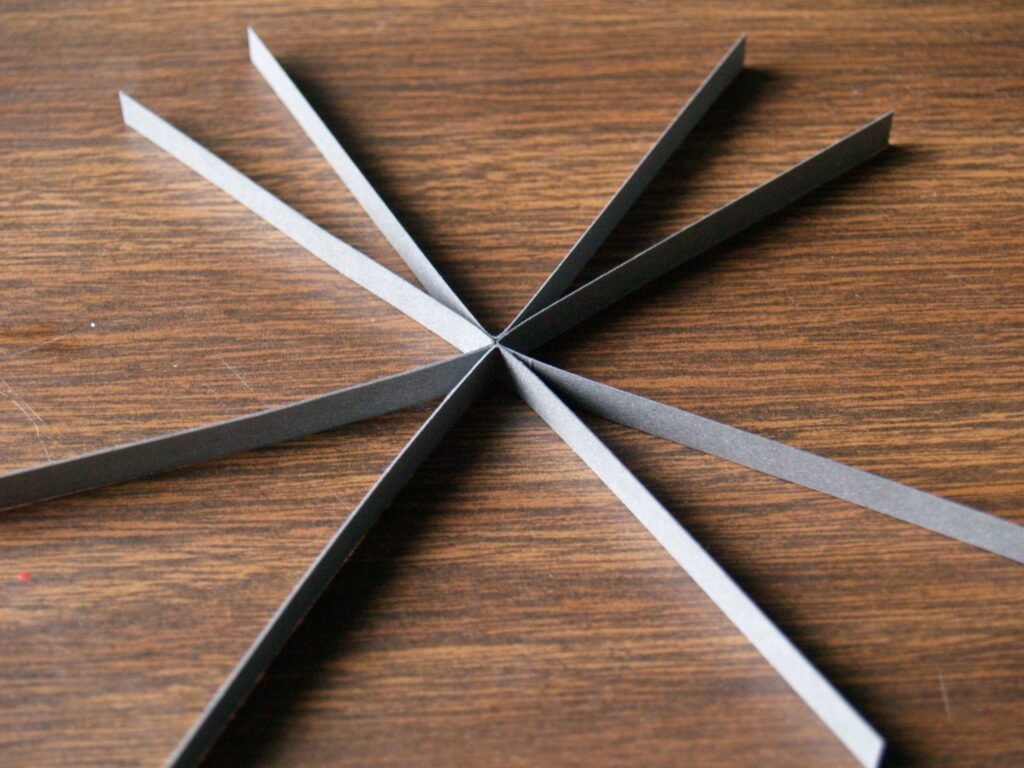
Then it’s time to bridge all those little spans. Start with the 1/2″ loose rounds and unroll them completely. Rolling them up gave them a little flexibility and put a curve into them that we need for this part. If we hadn’t taken the time to roll it up, it would just bend awkwardly instead of suggesting that graceful little drape of a real spiderweb. Glue one end of the 1/2″ piece to one arm, and the other end to another, a little less than halfway up the arm. Use your bobby pins to hold them in place.
Unroll your 3 inch scrolls, leaving that last roll in place. Glue each end down on one of the arms just like you did with the smaller pieces, this time up right near the top leaving that last curl to reach for the center. Bobby pins again to keep it stuck until the glue dries.
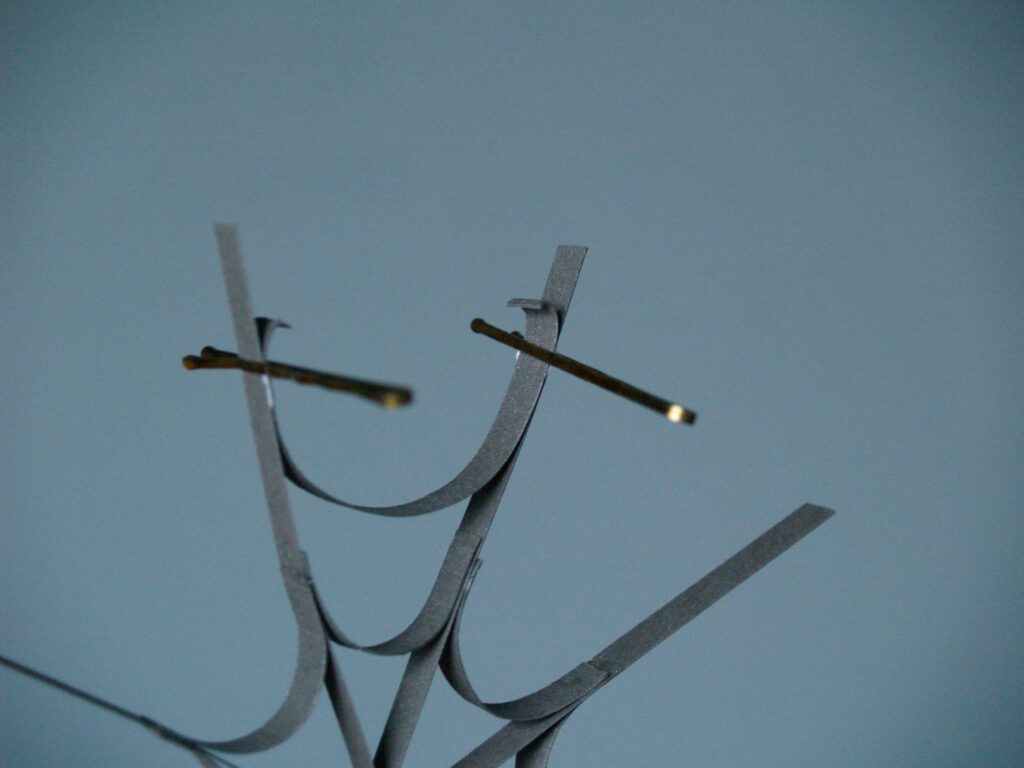
I found it a little awkward to work with for the first few I made. It’s a little fragile until you get some of those spans in place, and it can be a little fiddlesome to get those positioned right, but it just takes practice. I found it really helpful to alternate each arm and allowing it to dry so I didn’t have to deal with getting both sides in place at the same time. But after a while I had such a rhythm down I was throwing them all on at once.
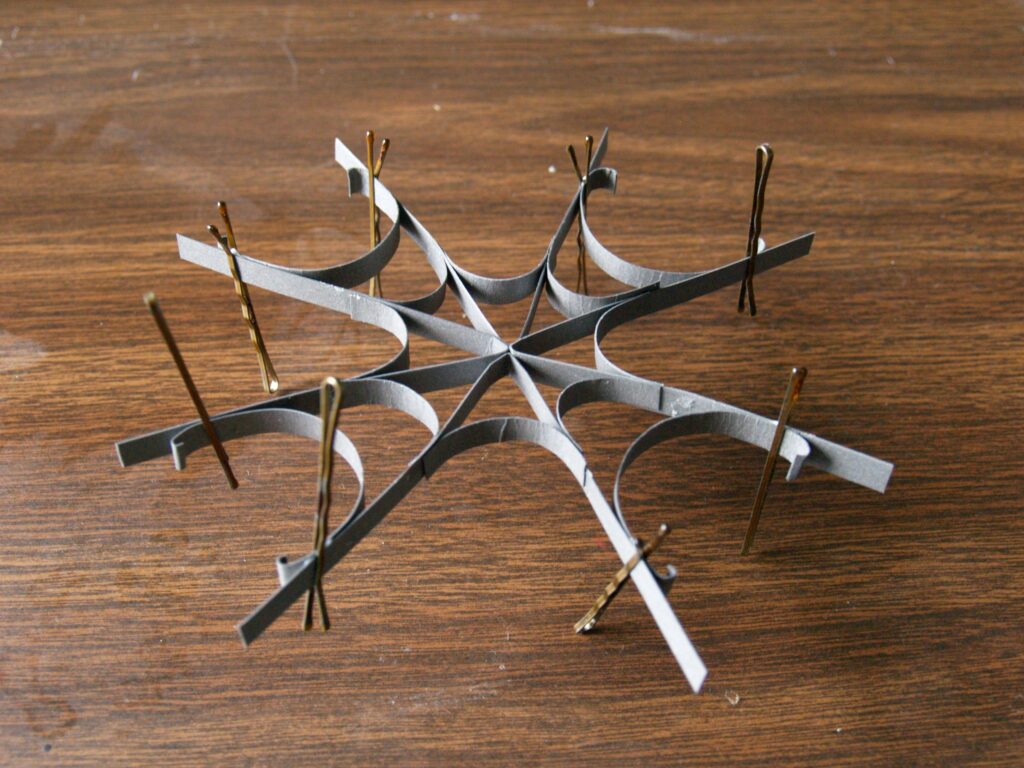
I tied a little bit of fishing line on these and used them to hang from my Gothic Halloween tree, but I kind of want to put them everywhere. I made so many of them that I think I’m going to tie them together to create a garland going down the stairs, but I also like the idea of making a wreath out of them, or just propping them up around the house so there’s a little bit of Halloween in every corner.
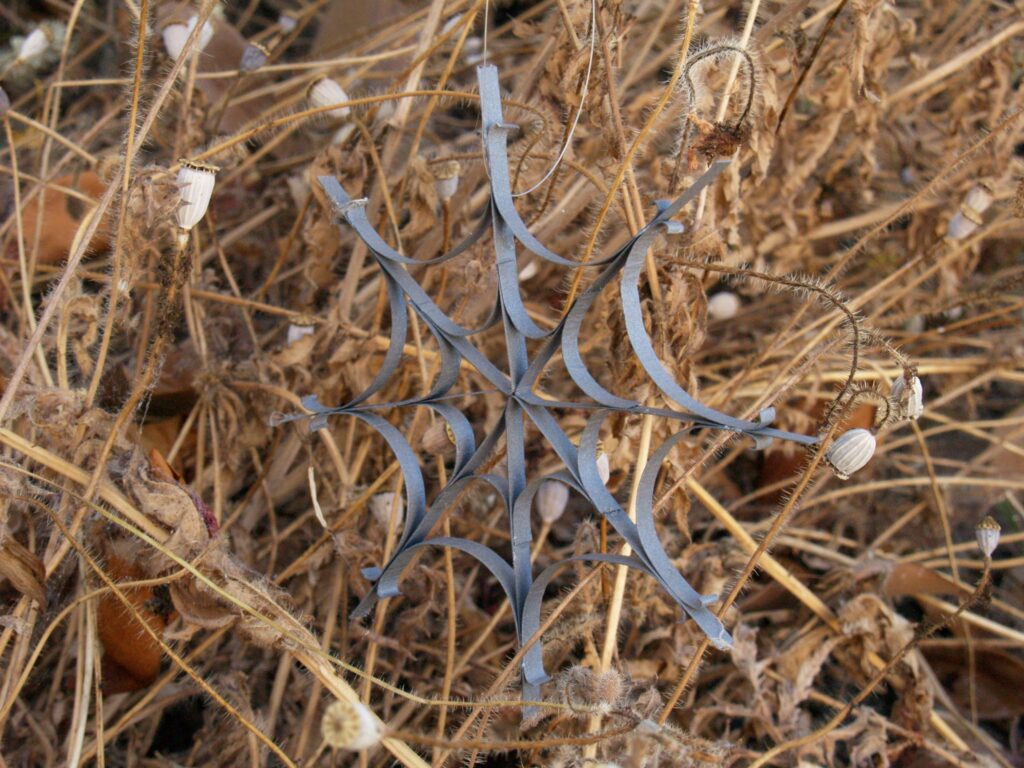
I’ve got a few leftover that I’m going to toss into my etsy shop, but in honor of the Halloween party I thought another giveaway would only make sense. Leave a comment on this post and I’ll draw a name at 8pm my time Monday night. I’ll send the lucky winner a set of 6 of these so they have enough to use on a tree, string together for a garland, or just hang from the ceiling in the entryway to creep out trick-or-treaters.
Good luck!
And the winner is…. Autumn of Autumn’s Antics! Email me and I’ll get those right out to you!
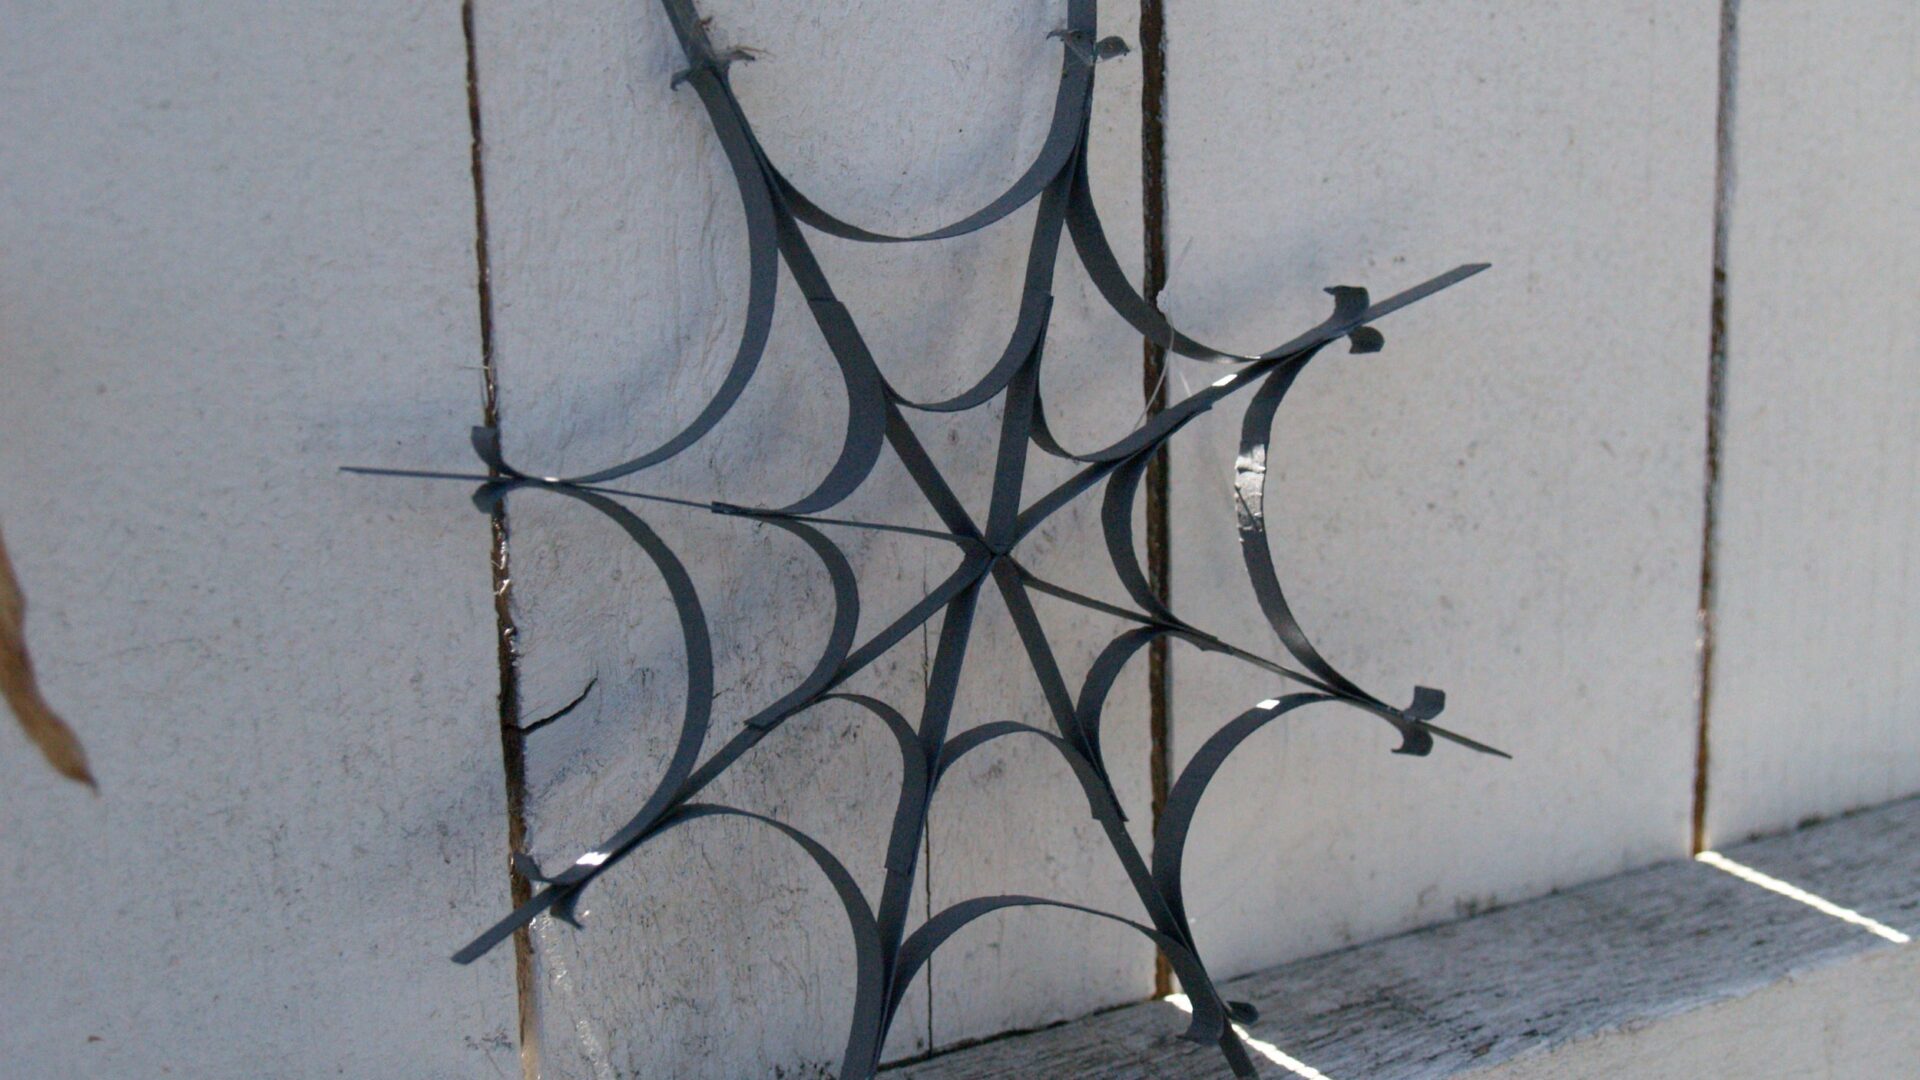

Wow- I will have to try that when I don't have WIP's! Thanks for sharing! I do like the finished web!I enjoyed my visit! <{:O)Be Enchanted!
Hello my pretties! Just flying in to see the festivities! Looks like a bloody ol’ time! Off I go with my broom! Vrrrooom!Visit my party@: <a href="http://www.comicreliefpris.blogspot.comwww.comicreliefpris.blogspot.com<br />POOF! i'm gone, on my broom….just can't wait to see another room!
What a great spiderweb creation and I love the witches ornament below. Pop over to my place to solve a mystery! Happy Halloween! Take care, Martha
You really are the next Martha! I love the spiderwebs – I'd love them to be MINE!
Well how sweet are you!?! You gave me a Treat before I said Trick! I love it! Do stop by and party with Alice and Dead Bob, if you dare! **kisskiss** Deborah
Not sure if I like the webs more or the snowflakes…. Hummmm….. BOTH!!! 🙂
It's gloulishly gorgeous…I thought it was metal! Thank you for your hospitality…steer your broom over to my place for more treats if you haven't flown in already!
Those are cool! Last Christmas I ordered myself a quilling tool to make your snowflakes, but it didn't come in time for Christmas, so I have it lying around and now I think I'll put it to use… unless you send me some instead!!
I really like your spider web … it would go great with the spider I quilled!
What a wonderful project! These spiderwebs are beautiful. Thanks for inviting me! Have a magical weekend! Twyla
super cool tutorial – if i don't win i'll have to try it for myself 😀
Very cool!! I have never seen anything like that before! Thanks!http://vivalayardsale.blogspot.com/2009/10/hauntingly-magical-celebration.html
These are seriously fantastic. I love them.Renee xoxo
hello, this is great !! I thought it was made of iron…:)thanks for the tutorial.greetings from belgiumInge
Hi, Great Halloween post! Thanks for sharing your great craft! Happy Halloween to you!
Hi there!Happy Hallowe'en and great party post!!!SpOOky Best,Chris (-:http://designsbyck.blogspot.com/2009/10/fanciful-halloween-party.html
Neat idea! Thanks for partying!http://autumnsantics.blogspot.com/2009/10/frightful-soiree.html~ Autumn Clark
FINALLY fell asleep at someone's party last night…so back to make rounds again today…Thank you for the invitation…so glad you left the decorations up for me!Please stop by and see my creative offerings for the party…they're still up, too!http://juliesopenwindow.blogspot.comjulieranae@hotmail.com
Wow!
Ooooooooo!! Super fun!! Thank you for sharing that, and thank you for being a delightful part of the festivites!
I used to quill! It has been a long time since I have seen it done. Wonderful design!! Love it. Great party!!Stop by mine.HugsSueAnn
Fabulous webs! Love them 🙂 If you haven't stopped for a visit, hop on your broom and come to my party!Cheers!Kristen
Luv your web! Sorry I missed the giveaway but I will try to make 1:) Thanks for sharing! Also like your patterns – will have to come back soon;)
Love your crafts!!!Come on over for a party and giveaway!http://littlebearries.blogspot.com/2009/10/come-in-come-in.html
Love this web (and quilling in general) – what a great idea!