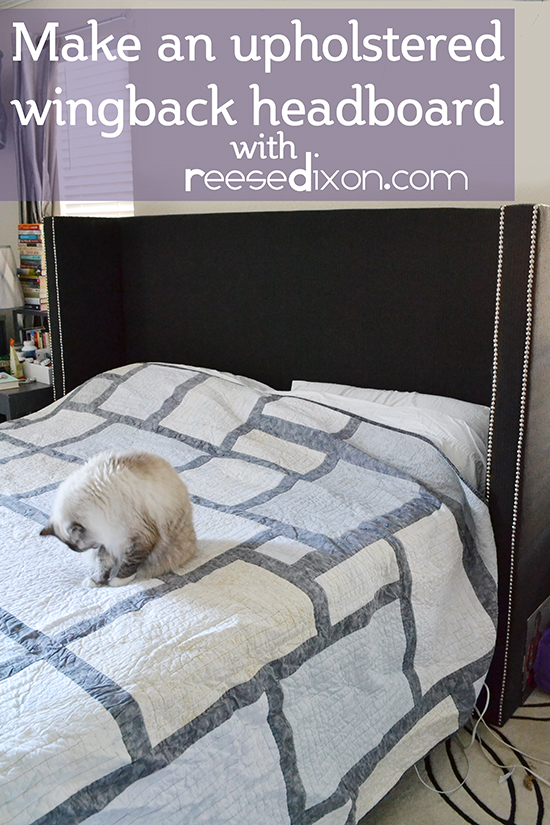
So, I promised this a couple weeks ago already, but travel and doctors appointments and first days of school have foiled all my good intentions. But I’m getting my feet back underneath me, so let’s pick up where we left off in this bedroom makeover, shall we? I made a bedframe, and now we’re going to make the over the top fabulous headboard that goes with it. To recap, the theme for this bedroom was feminine masculinity. So in keeping with the upholstered bedframe, I knew I wanted an upholstered headboard that would look like a pinstriped blinged out suit, and evoked the big wingback armchairs of an old-fashioned library or smoking lounge. The only problem is that the one I wanted cost over 10 thousand dollars. So what was a girl to do? Make it myself of course.
This does require a bit of woodworking, but it’s my kind of woodworking where you can be a little sloppy with things and it won’t matter because it will all get covered up with fabric. Even if you’ve never cut a piece of wood, I think you can do this.
All the lumber I used were simple 2×4’s. You might also see them labled as “studs” in the lumber aisle. Since this is all getting covered up, save yourself some cash and use the cheap stuff. All the screws I used were 2 1/2″ wood screws.
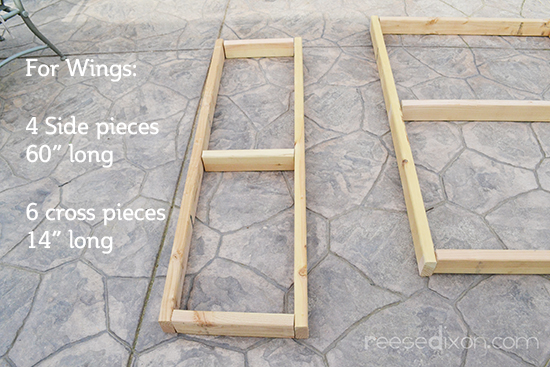
The headboard is made up of three pieces: the two wings and the center piece. Each are built pretty much the same way, just build a box with a cross piece to keep things square. The crosspieces go inside the long pieces, and everywhere two pieces meet gets secured by drilling pilot holes for two screws and then attaching the pieces with the wood screws. Build two boxes exactly the same to be the two wing pieces.
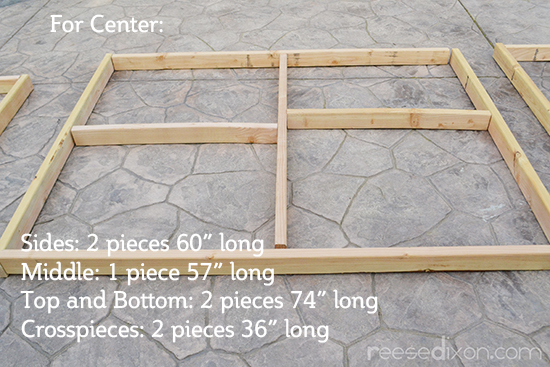
Because the center piece is so much bigger, it needs some more support on the inside. Pay special attention to how the pieces are arranged because that would really mess up all your measurements. Build the box part first, with the top and bottom pieces inside the side pieces. Then add the center vertical post. Measure so that you’re installing it right in the center because that will matter in a couple of steps. Pilot holes and two screws in each spot where they join. Then you need the two cross pieces, but they need to be offset so you can attach them to the center post.
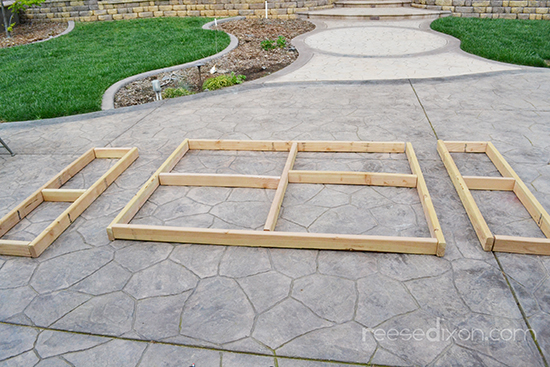
Here’s the three pieces all framed out. Attaching them altogether won’t happen until they’re upholstered.
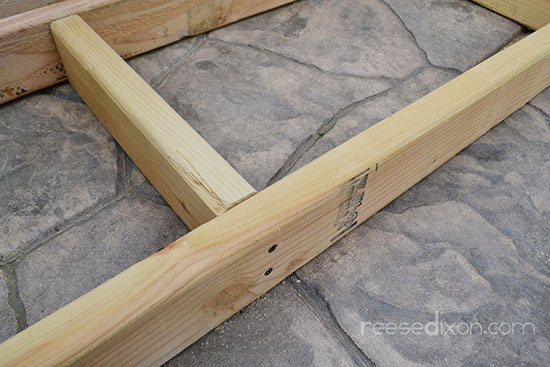
And a closeup on how those screws are used to keep the crosspieces in place. Drilling pilot holes with a drill bit the same size or just smaller than your screw will keep the wood from splitting and save your sanity from trying to screw in a screw that refuses to go where you want it to.
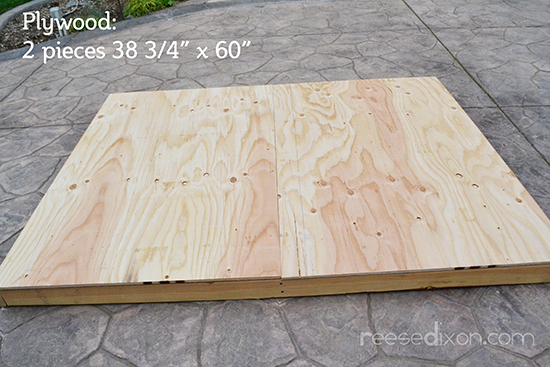
Next each of these framed boxes you’ve made need to be covered with plywood. I could not find plywood big enough to cover my center piece in one piece, so I had two pieces of plywood cut just wide enough to meet in that center post and then screwed them into that.
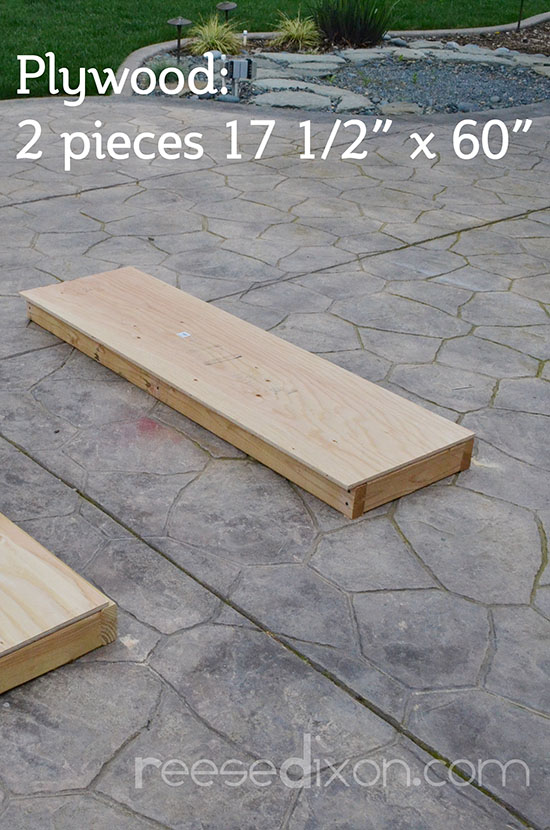
Wood screws all around the sides until the plywood is stuck for life.
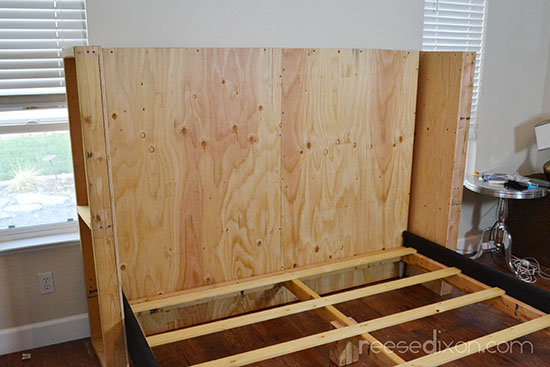
From this point on I brought it in the house to upholster. You don’t want to attach anything yet because that will make upholstering a million times harder, but you do want to know *where* you’ll be attaching things when it’s time for that. So it’s time for more pilot holes. Drill four holes along each side where the wings will attach to the center. Line the side of the wings up flush with the back of the center headboard piece, and drill a hole through at the top, two throughout the center, and one more at the bottom. Put more pilot holes along the bottom of the headboard where the bedframe will attach. One hole on the left, a couple straddling that center beam, and one more on the right. REMEMBER: Don’t use wood screws yet. You’re just leaving a mark to upholster around.
With the holes drilled, upholstering can begin. I neglected to take pictures of this part of the process. Sometimes I get on a role with the making and forget that some parts of this aren’t common knowledge. Each of the three pieces needs to be covered with a layer of batting. This adds a layer of softness to the whole thing while keeping the fabric from wearing out by rubbing against the unfinished wood. Lay the batting out and then place your wood piece on top of it, plywood side down, bringing the extra batting around to the back and then staple it in place. Remember, the batting will not be visible so it can be ugly as ugly in there and as long as it’s not lumpy no one will ever be the wiser.
For the center piece, upholstering with the final fabric is done in the exact same way. Lay out your pinstripe fabric and place the center piece over it, flat side down. Being careful not to pull so hard you warp the fabric pattern, pull the extra fabric to the back of all four sides and staple it in place. For my king size bed and the fabric pattern I chose, I had to sew a couple pieces together to get it wide enough to cover the whole piece. For a bonus technique you could sew three pieces of fabric together so that the seam doesn’t run right down the middle of the headboard. Two seams are better than one if they are off to the sides and out of the way.
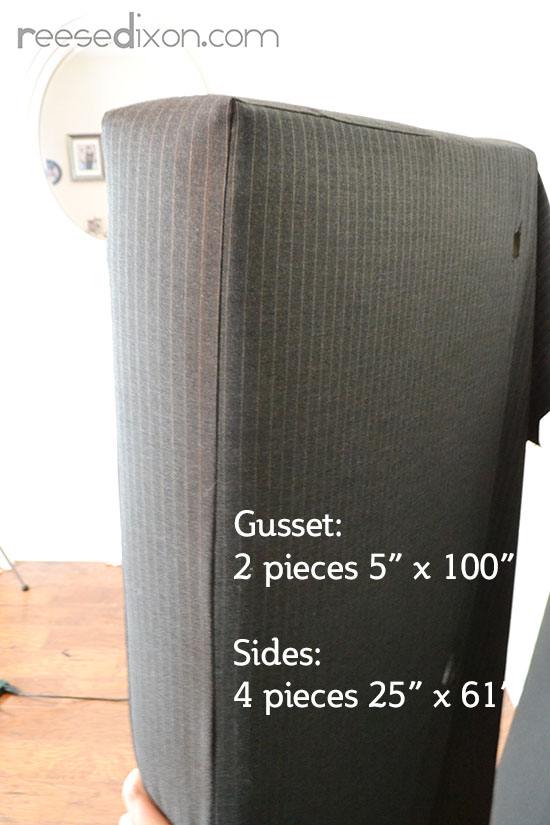
To upholster the wings, it looks best if you do a little sewing. This tutorial might help if you’ve never had to do this kind of thing. You’re basically just sewing a bench cushion while leaving one end open. For each wing, you need to sew two side pieces to the gusset, which is the piece that runs down the middle. Sew each side to the gusset on the top, a long side, and the bottom, leaving the other long side open. When you’re done you’ll have a little cover ready to slide right on to the wing.
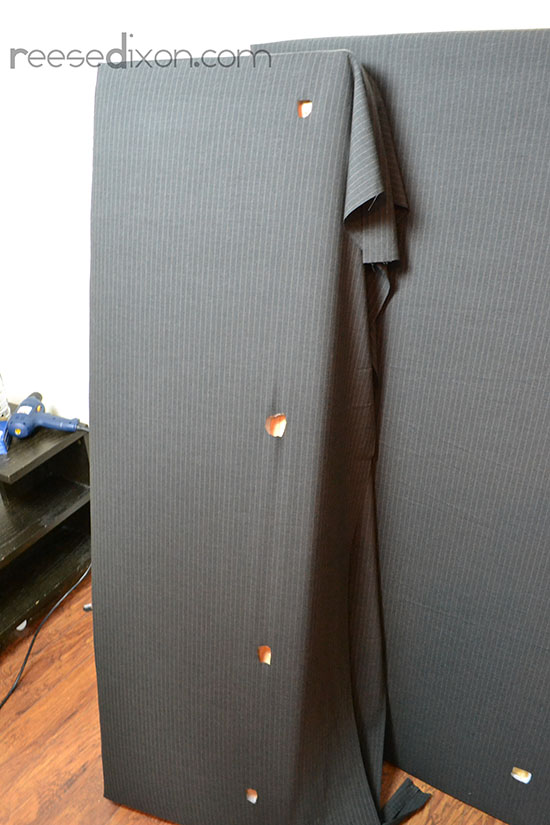
If you press your fingers over the fabric, you’ll find the pilot holes you created. Cut out a square of fabric and batting to reveal the hole without any fabric in the way. Drills and fabric are mortal enemies, so you want to make sure you’ll be able to get the wood screw in place without any of the fabric snagging and ripping your beautiful creation. These holes will be sandwiched behind the other pieces and won’t be visible. Cut the same holes in the headboard where it will join the bedframe.
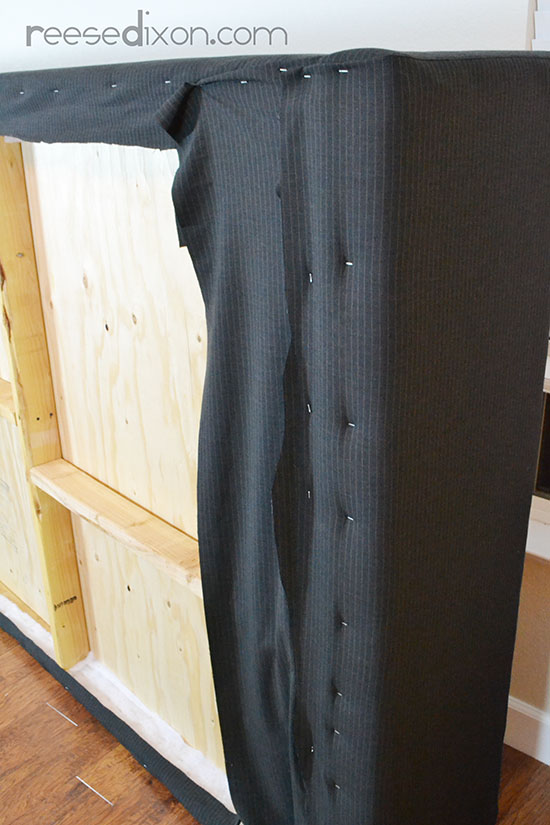
Now that the upholstery is on all three pieces, you can attach them together. It takes a little bit of wrestling, but pull the outside wing upholstery back just enough to get the drill in and screw through all your pilot holes. When the piece is attached, you can then bring all the extra fabric around to the back and staple it in place. Remember, if you’re using a pattern like pinstripes you don’t want to pull so hard you pattern gets out of alignment, but you do want it nice and snug.
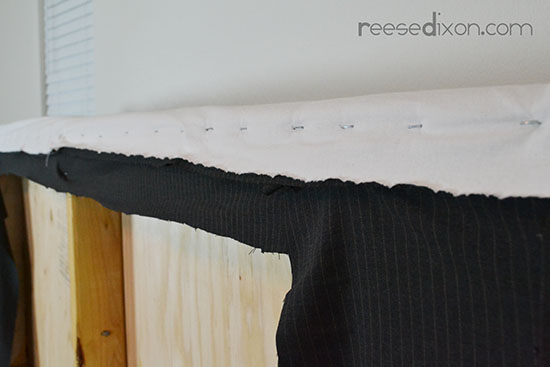
Now it’s time to address the back. Theoretically, you can leave this alone, but my brain will never allow that to happen. On the sides without plywood I like to add a layer of muslin to add another layer the wood has to wear through before it makes a mark on my pretty fabric. So with a piece of muslin, and a piece of suiting material, both wide enough to cover the entire back piece, I take the top edge and staple it along the whole back of the headboard. But! You can do it in a way that hides all your staples if you lay your fabric out right. Lay the patterned piece over the front of the headboard, right side touching the right side of the front. Then lay your muslin over that and staple away. Flip the fabric towards the back and all your staples will be on the inside.

For the other three sides you could get some fancy upholstery tools involved, or you could just neatly fold the edges in and neatly staple it in place. I went for the neat staples. This will be facing my wall, after all.

I wanted to finish off my headboard with a row of nail head trim along the wings. The trim comes in a long roll that you bend in to place and then nail every 4th nailhead. It saved me a ton of time and looks great.

With my headboard finished we brought the bedframe back in and attached it through the pilot holes we created.
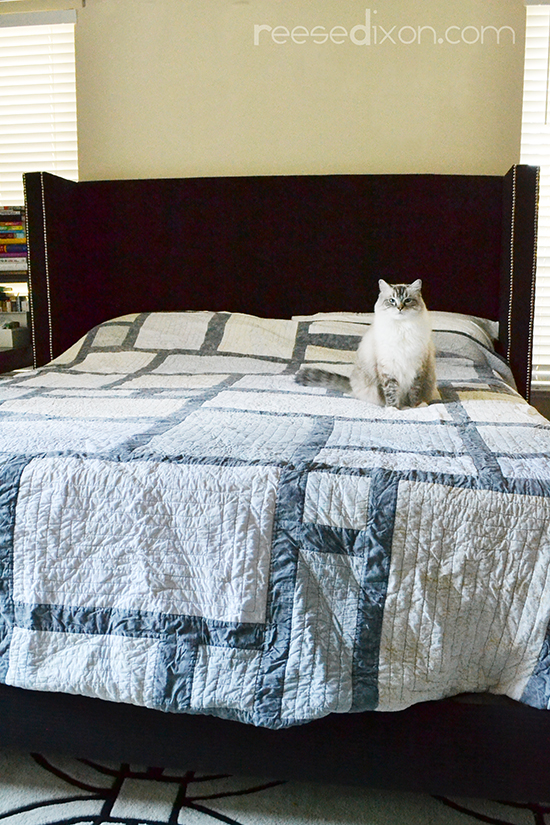
I’m pretty much obsessed with it. It is such a grand statement and super comfortable, and I saved myself about $9500 off my dream bed. Now I need to outfit this bed with more pillows than a person needs.

hey
that a great work
if you do not attend the doctor appointment then we do not read the article. ha ha
thanks