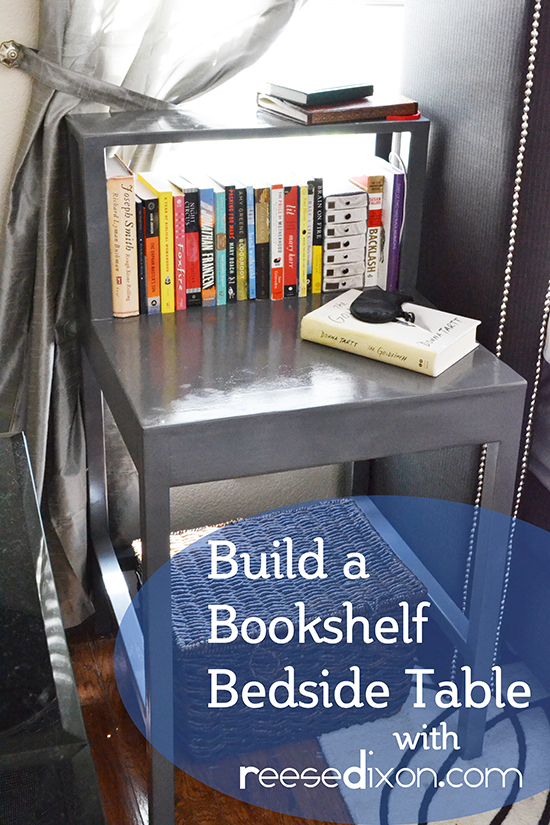
All my life I’ve had trouble keeping my books corralled. When I was a kid I used to spend the whole summer moving from one spot in the house to another carrying a large cardboard box full of my library books. These days the books are in piles next to every one of my chairs. You can even usually find one propped open on the bathroom scale waiting for me to need to spend a while on the john. I don’t like to waste a moment.
So obviously with that kind of a habit, my bedside table was drowning in books. Stacked up on each other until they fell over, piled up on the floor until the cats got to them, Atti has grown up playing with books like they were building blocks. The bedside table of my dreams had to be as much bookshelf as bedside table, so I had to build it myself.
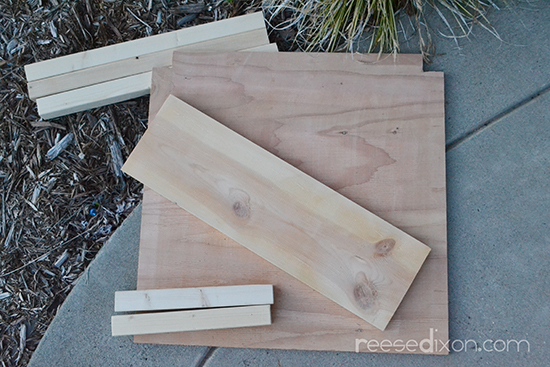
Pictured here:
The tabletop, which is a piece of 1/2″ plywood cut to 24″ x 24″, with 2″ squares cut out of two corners to fit table legs.
The bookshelf, which is a 5 x 8 cut 24″ long
The leg braces, which are 3 2 x 2’s cut 21″ long
The legs for the bookshelf which are 2 2 x 2’s cut 11 1/2″ long
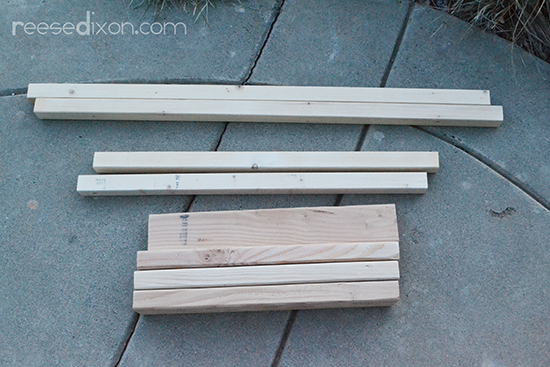
Pictured here:
Pieces for the table apron which are 4 2×4’s cut 21″ long
Front legs which are 2 2×2’s cut 30″ long
Back legs which are 2 2×2’s cut 42″ long
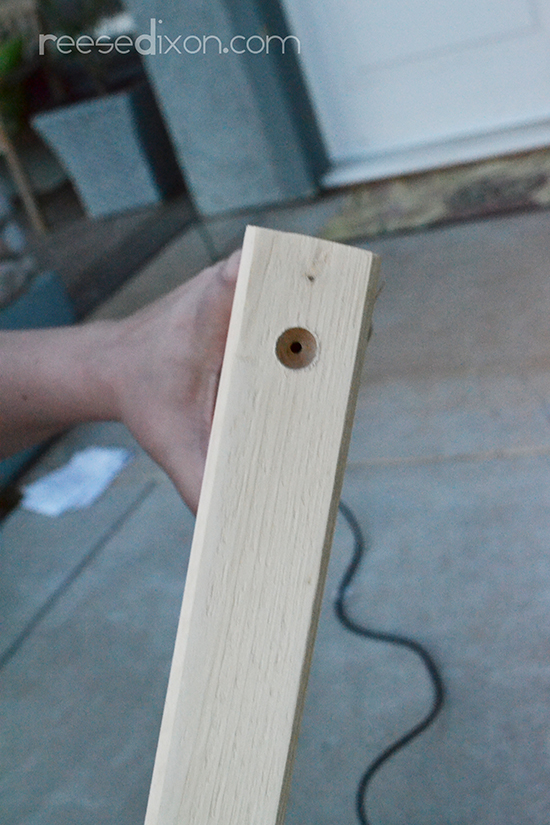
I wanted all my screws to be hidden so I drilled each pilot hole with a countersink bit. This drills a wider hole around the smaller pilot hole so the head of your screw can hide down underneath the surface of the wood. You just fill this hole with wood filler and no screws to mar your paint finish.
I used 2 1/2″ screws for most of the assembly, accept for attaching the plywood tabletop where I used 3/4″ screws.
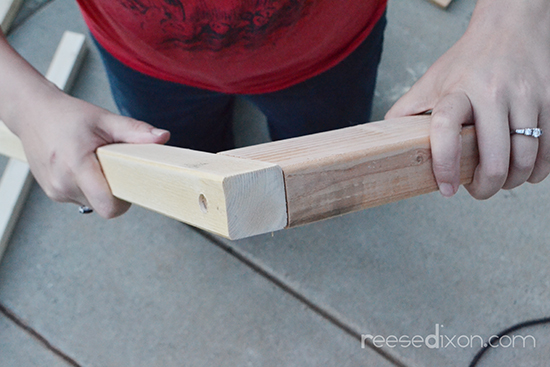
Start with the front legs and sandwich one of the apron pieces between them. Drill countersunk pilot hole and attach with 2 1/2″ screw. Attach the other front leg to the other side of the apron piece.
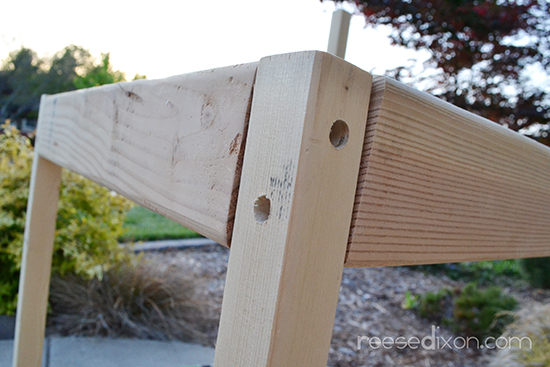
Attach the side apron pieces to the front legs, offsetting the screws so they don’t run into each other. Make sure your apron pieces are lined up and check for level as you work. You need the plywood tabletop to lay flush, so the apron pieces have to be even.
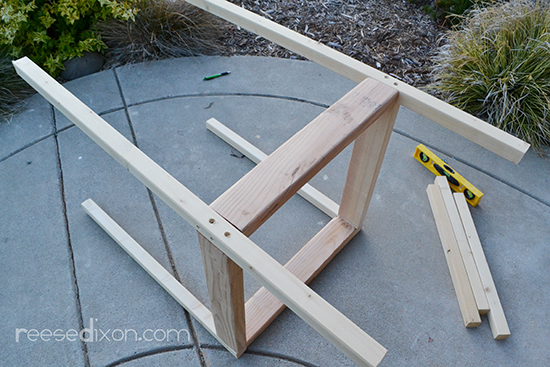
Line the back legs up so that one end is flush with the front leg and the other side extends beyond the apron pieces by 12″. It’s important to get these pieces positioned right or else your table will wobble and your bookshelf won’t be straight. Measure, check for level, measure again. Then screw into the side apron pieces, and attach the last apron piece in between the two legs.
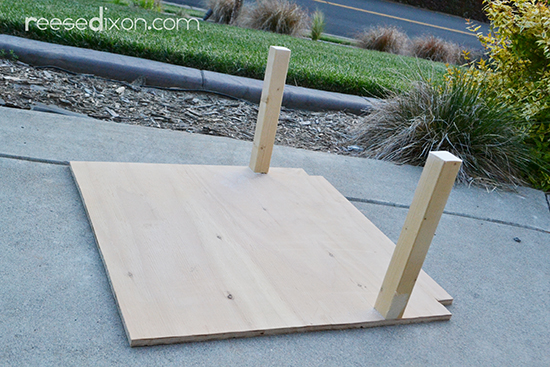
Before you attach the tabletop, you have to attach the legs that will hold up the bookshelf. Lay the bookshelf piece on top and mark where the edge hits. Line the legs up with that edge on one side, the side of the tabletop on the other. Then screw up from the bottom of the tabletop into the legs. This part doesn’t have to be countersunk of course, so be sure and switch your drill bit before you drill right through your tabletop.

Check the table legs for level. Here’s where you do any fixing that you need. Sand the aprons that aren’t lining up, sand the legs that you measured funny *ahem* (me), check your bookshelf for level and repeat the process. When you’re happy with how things are laying, attach the tabletop to the apron using the 3/4″ screws. Attach the bookshelf to it’s legs in the same way. Fill in the holes with woodfiller and let it dry.

I used the woodfiller around the whole project. It helps make cheap lumber not look so cheap, covers up any sins from your cuts not being perfect, it just gives the whole piece an airbrushing. Sand it all down once it’s dry and blend the woodfiller in to the rest of the surface. Then paint the piece in whatever way you like best. I primed it (because raw wood requires it) and then used a few cans of spray paint to build up the color.
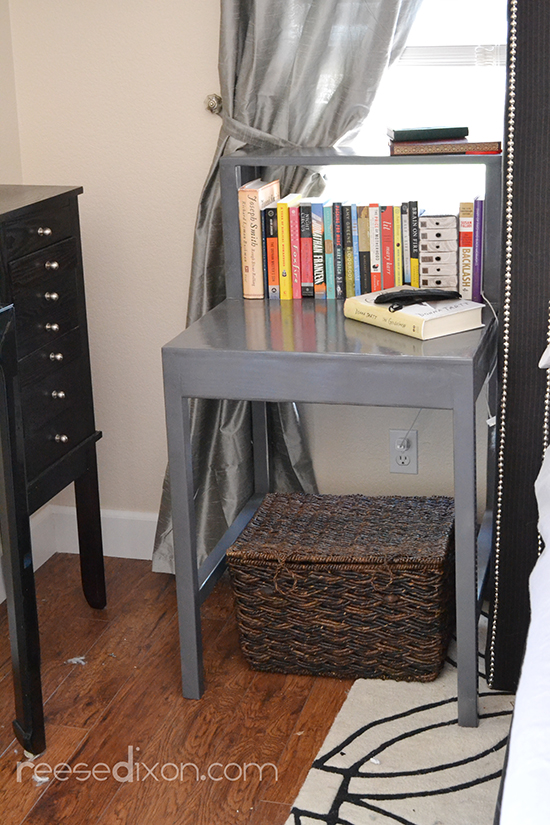
I love the industrial gray color that came out of my experimenting. It almost looks like one of those old file cabinets to me, which, for this project, in this bedroom, is perfect. Now my books are safe from Atti chomping, from cat barfing, and all I have to do is limit myself to the books that can fit inside this space. Which is already proving to be difficult. My next step is just to start sleeping in the library.


Hi,
I am really happy to see your post. As a professional power tools blog writer I think it will very helpful for me. Thanks
It’s always difficult to keep the necessary items like the books, purse, wallet, medicines, mobile phones, water bottle, and more such things near the bed without having a side table or wall, so I liked choosing the most suitable bedroom shelves for me. Now, I don’t have to worry about keeping my personal belongings in an organised manner.